Unity visionOS Platform Is Here! (PolySpatial MR Tools)
Today, I am pleased to announce that Unity has finally made the visionOS developer tools available to developers. I've been eagerly anticipating this, and I don't think it could have come at a better time, as most of my recent efforts have been dedicated to visionOS native development.
Let me begin by introducing several features that will enable you to create what we currently refer to as "Virtual Reality" and "Mixed Reality." However, I will also introduce you to some terminology and the proper language used by Apple. You might wonder, "Why should we change terms?" Well, that's simply how Apple describes these concepts. Even if we may not prefer it, understanding their terminology will help you make more informed decisions when determining the type of experience you want to create and the features you want to incorporate.
What Is The Unity visionOS Platform?
Fig 1.0 - visionOS (experimental) platform.
I think is important to point out the key concepts. Unity visionOS platform is the entire toolkit or wrapper in Unity which integrates the major visionOS native features. Similar to iOS or Android, we now have a new platform where we can build apps or games, which in this case happens to be visionOS for Apple vision Pro development. (See Fig 1.0 for platform details)
Ultimately, with this feature we can now compile, build, and run visionOS apps or games all with Unity, the result is a Xcode project which can be ran in the visionOS simulator or the physical Apple Vision Pro hardware. We will talk more about this process later on this post.
What Is A Fully Immersive Experience?
I think the easiest way to remember this is by the word “Fully” which means we are referring to an experience in which we’re fully replacing the physical world with virtual content (VR). In this case, the physical world is completely hidden and all you see is a virtual environment that may offer a variety of 2D or 3D objects, perhaps also UI components depending on what you decide to build and where your imagination takes you. An easy way to see this in code is to look at the implementation of how you initialize an “Immersive Space” with Swift, see example below:
ImmersiveSpace(id: "MyFullImmersiveSpace"){
    MyFullImmersiveSpaceView()
}
.immersionStyle(selection: .constant(.full), in: .full)
But, How does Unity handle creating an Immersive Space similar to the native Swift code above?
Fig 1.1 - Unity Apple visionOS setting for Virtual Reality
In Unity, we don’t have to write any code to determine what type of experience we’re building. For instance, if you want to build a Fully Immersive experience simply modify the App Mode setting which tells Unity how to handle visionOS project creation when you build and run your visionOS application. (Fig 1.1 shows you the App Mode setting from Player Settings > XR Plug-in Management > Apple visionOS)
Fully Immersive / VR experiences are great, they’ve their place and an infinite amount of use cases, but don’t get me wrong, Mixed Reality plays a huge role in our future, we will be using this tech on daily activities, similar to how a mobile phone is today or how a smart watch is indispensable to many of us. I am sure we will look back in a few years and say “What? Why were we looking at a mobile device with a 2D screen?” hehe anyhow back to the topic, let’s move onto the Mixed Reality experiences next.
What Is An Immersive Space / MR Experience?
Unlike, Fully Immersive, Apple is now dropping the word “Fully”, I know is a bit confusing, but in this case Immersive Space or “Mixed” which is also used by Apple in their native code to refer to a Mixed Reality experience. This is where we don’t replace the physical world, instead we keep it, we extend it, by using the world as our canvas. In this case, we add virtual content that can be persistent or non-persistent, content that can be placed on the ground or floating in the air.
Apple also makes this a bit more complicated, but they do it for a great reason, we now know that we can have a mixed reality experience and we do that by combining the physical world with the digital world, but Apple takes it a step further. Honestly, this is not novelty, Magic Leap and Microsoft did this with the Magic Leap 1 and HoloLens 2, and that is to allow mixed reality experiences in a “Shared Space”. This means we can have mixed reality experiences in which individual apps or games shared their bounding area with other experiences. (See images below as a reference of how the shared space looks like with the visionOS simulator)


I showed you how to declare a fully immersive experience with native code and also how it compares to Unity App Mode settings. Well, the same can be said about Immersive Space / MR experiences. Let me show you the differences between the native implementation and how Unity handles it.
First, let’s take a look at how we can define a mixed reality experience natively with Swift.
WindowGroup(id: "MySharedSpaceApp"){
    MySharedSpaceAppView()
}
.windowStyle(.volumetric)
.defaultSize(width: 0.65, height: 0.3, depth: 0.3, in: .meters)Fig 1.2 - Unity Apple visionOS setting for Mixed Reality
Simple, right? Basically, we define the name of our window as "MySharedSpace," just like we did in the prior Swift example, followed by the RealityKit View "MySharedSpaceAppView." Then, we specify the environment model for the view. The Window Style "Volumetric" is important because we want an area that can render both 2D and 3D content. Lastly, we specify the size of our window, or you could say, our bounding area. Cool, huh? What about creating a mixed reality experience that doesn't have a bounding area? Well, let's call that an unbounded area because that term will make more sense as I introduce you to Unity terminology.
ImmersiveSpace(id: "MyFullMixedRealityApp"){
    MyFullMixedRealityAppView()
}
.immersionStyle(selection: .constant(.mixed), in: .mixed)
This code may look super similar to what we created for our Fully Immersive Experience, right? Well, that’s completely true because it is. The only difference here is the change from “.full” to “.mixed.” This small change tells visionOS that we want to allocate an Immersive Space of type “.mixed,” or, easier said, “Mixed Reality.” That’s pretty straightforward, you may say, and I would agree, but Unity makes it even simpler than that. (See Fig 1.2, which is exactly what we did with Fig 1.1, but we changed the setting from “Virtual Reality - Fully Immersive Space” to “Mixed Reality - Volume or Immersive Space.”)
Question: At this point, you may be thinking, 'What about AR Features? Dilmer didn't mention any.' Well, let me briefly talk about it. When you're defining either a mixed or fully immersive experience, it is important to know that ARKit features are ONLY supported when the area is not shared. This makes sense in my mind because plane detection, hand tracking, skeleton info, meshing, and other features are more applicable when you're building a fully mixed reality experience where you aren't bound to a specific area. This could also be said true if you’re building a fully immersive experience (VR) and you need hand tracking joints data, in that case it makes sense to get access from ARKit. We will talk more about AR Features in future videos, also know that AR Features are currently not supported in the simulator, but Unity provides XR Simulation tools which I showed during my YouTube video.
How Do We Create A visionOS Experience In Unity?
First, I would suggest watching my Unity visionOS YouTube video. But if you prefer to read a simple list of steps, then keep reading. I will do my best to explain exactly what is needed. Otherwise, you can use my YouTube video as a supplement to this list. My goal here is to allow you to build a very simple Unity visionOS demo and see it running in the visionOS simulator.
Fig 1.3 - Unity 2022 LTS visionOS Build Support
Hardware and Software Requirements:
Unity 2022 LTS.
Xcode 15 beta 2 or greater.
visionOS platform and simulator are required (install Xcode first and then you can install these tools through Xcode).
Apple Silicon Mac (Intel based systems may be supported in the future).
For additional help on installing native tools refer to this YouTube video.
Licensing Requirements:
visionOS is currently only available with Unity Pro 😔.
There’s a free 30-day Unity Pro trial available which you can use as an evaluation of the tools before you decide to upgrade.
“Unity’s visionOS beta program is available for all subscribers on Unity Pro, Unity Enterprise and Unity Industry. Subscribers can download the visionOS support packages directly from the package manager and start building experiences for the Apple Vision Pro device.”
Unity Pro Pricing: $2,040 /yr per seat or $185 /mo per seat.
Okay, now that you know the main requirements, let's move on to creating your first visionOS application with Unity:
Fig 1.4 - Unity visionOS Volume Camera Component
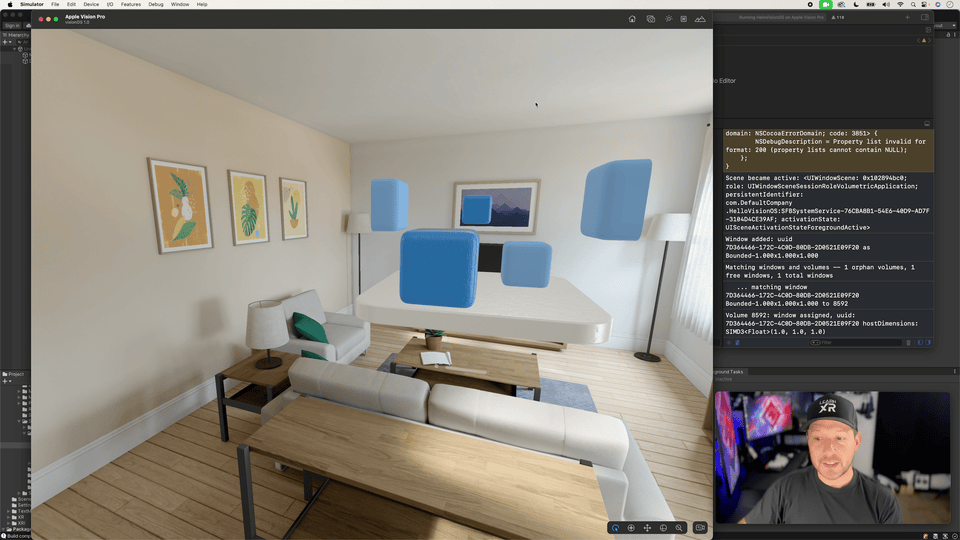
Fig 1.5 - Volume Camera with a Cube Results
In your Unity 2022 LTS installation, make sure to include visionOS (Experimental) platform. (See Fig 1.3)
Create a new Unity project by using Unity 2022 LTS, I would say name it “HelloVisionOS”.
Go to File > Build Settings and change your platform to “visionOS (experimental)”.
Rename the generated scene to “HelloVisionOS_Cube” and make sure is added to Build Settings as a scene.
Remove the “Global Volume” from the hierarchy if it exist.
Click anywhere on the scene view and press “`” the backtick, this should bring up a small overlay window which should allow you to click on "Volume Camera”. If you don’t see this option simply create an empty game object, name it “VolumeCamera” and add a “Volume Camera” component to it. Either way be sure to have this volume camera at position (0,0,0). (See Fig 1.4)
Go to Window > Package Manager, click on “+” Add Package By Name and let’s add the following packages:
com.unity.xr.visionos
com.unity.polyspatial
com.unity.polyspatial.visionos
com.unity.polyspatial.xr
In your project tab go to Assets > Resources, right click on Resources > Create > PolySpatial > Volume Camera Configuration and name it “VolumeCameraConfiguration_ForCube”.
Click on “VolumeCameraConfiguration_ForCube” and change the mode to “Bounded”. (this is a very important setting to remember, if you want a bounded / shared space experience then use bounded otherwise unbounded)
Click on your “VolumeCamera” game object through the hierarchy and assign the Output Configuration setting to be the “VolumeCameraConfiguration_ForCube” file.
Add a cube by right clicking on the hierarchy > 3D Object > Cube, then scale it down to be (0.1f, 0.1f, 0.1f) which is 10% of its original size and rotate it to be 45 degrees on the Y axis.
Click on your “VolumeCamera” & make sure gizmos are turned on. (See Fig 1.5 for results and you can look at this image to verify the previous steps)
Go to File > Build Settings > Player Settings > XR Plug-in Management
Enable “Apple visionOS” under the visiosOS platform (this may have an invisible icon but it should be the third tab from your left).
Click on “Apple visionOS” under XR Plug-in Management on your left panel and set the App Mode to “Mixed Reality - Volume or Immersive Space”.
Populate the “Hands Tracking Usage Description” and “World Sensing Usage Description” with any input.
Click on “Project Validation” under XR Plug-in Management on your left panel and fix all issues, I recommend to just click on “Fix All”, and later on you can learn about all the changes, so for now just proceed to do it.
Go to Player Settings > Player and under the visionOS player settings scroll down until you find Target SDK, change it from “Device SDK” to “Simulator SDK”. If you want to run this on the physical device then leave it as “Device SDK”.
Go back to File > Build Settings and click on Build And Run to create a new build.
At this point you should have a Xcode project generated at your target location. Let’s open the file with “.xcodeproj” extension which is the Xcode project.
In Xcode click on the “Play” button to build your project to the visionOS simulator. (make sure your target device is the visionOS simulator, if you don’t see one then you may need to add a simulator by clicking on Window > Devices and Simulators)
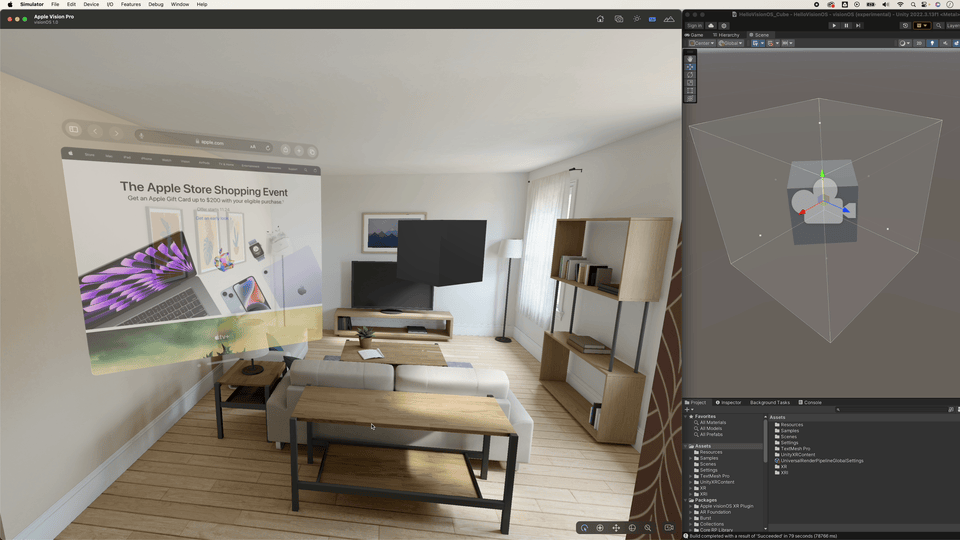
The results should look like what you see below. Also, feel free to download this GitHub project which includes this scene and others.
Additional visionOS With Unity Resources & Wrapping this up!
I hope you enjoy reading this post. Honestly, I could write many posts about it, but I need to wrap it up for now. I will be talking more about visionOS with Unity and native visionOS development, including covering URP with ShaderGraph support, Play To Device features, and more about creating experiences with PolySpatial. For now, I recommend looking at the following resources, which I found very beneficial when learning these tools. If you enjoy this post, please drop a comment below. I read every single comment on this blog, and knowing that there are people reading it helps me understand what type of information you find helpful. Even if you just say, 'Hi Dilmer, you are cool!' (joking), hehe, thanks everyone, and have an amazing future and the rest of your day.
visionOS with Unity Resources
Unity VisionOS Platform Overview
Supported vs Unsupported Unity Components
FAQ (For Common VisionOS PolySpatial Issues)
GitHub Project with a variety of visionOS examples with Unity
Native visionOS Project covered on previous visionOS videos