Hand Tracking Microgestures Now Available!
Who would've thought that Hand Tracking technology could ever get this accurate? I still remember testing it back in early 2020 on a Quest 1, where latency and accuracy were nowhere near what we have today. Even crazier, Quest devices can now detect Microgestures. But are they accurate? Well, let’s talk about its definition, device compatibility, software requirements, and a few cool examples I built that showcases this tech.
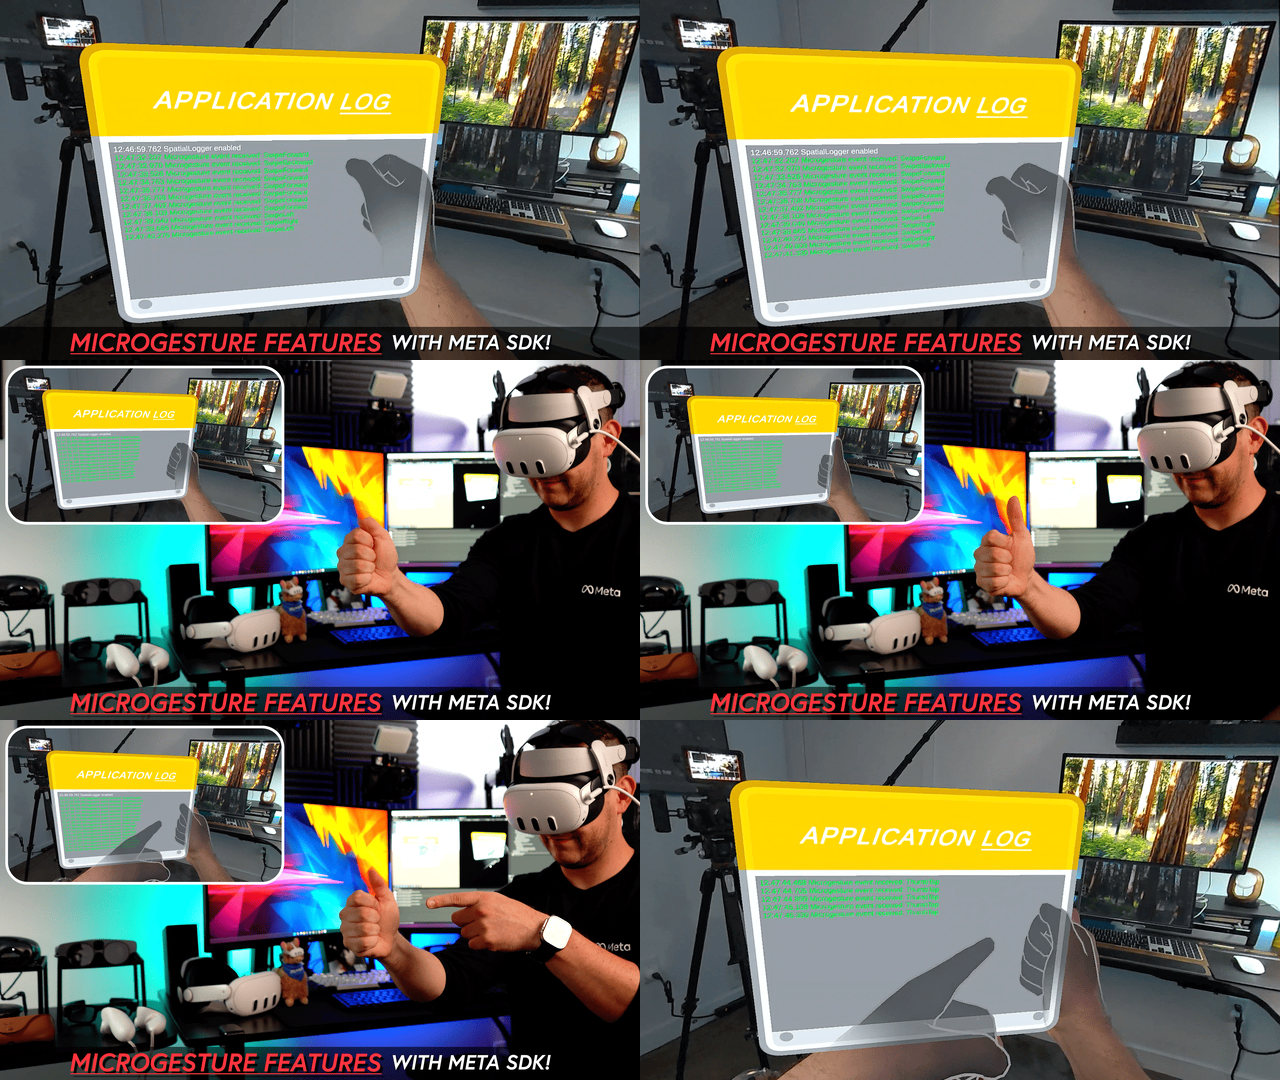
Fig 1.0 - Directional thumb swipes (Microgestures)
What are Microgestures?
The word Microgesture pretty much defines itself, these are very small gestures we perform with our fingers, which are then converted into D-PAD-like directional inputs. Think of it like the D-PAD on your PS5 or Xbox controller: you have arrows (left, right, up, and down) that let you, for instance, move a character in four directions. Microgestures work similarly, our thumb movements are tracked by the Quest cameras to detect those gestures. Here’s how Meta defines it: “Microgestures expand the capabilities of hand tracking by recognizing low-calorie thumb tap and thumb swipe motions performed on the side of the index finger. These gestures trigger discrete D-pad-like directional commands.” See Fig. 1.0 for a visual guide on how to trigger these thumb finger gestures.
Hardware & Software Requirements?
Quest 2, Quest Pro, and the Quest 3 family of devices
Unity version 2021 LTS and above (I used Unity 6 while prototyping with Microgestures)
Meta XR Interaction SDK v74 and above
(Optional - PC Only) Be sure to Download and install Meta Link from here
(Optional - PC Only) Get this compatible Meta Link USB-C cable to test Microgestures right from the Unity Editor
How to Integrate Microgestures with Your Own Unity Project?
To integrate Hand Tracking microgestures you could create a new Unity project or use an existing one. Below you can find all the steps, feel free to skip some of the initial steps if you’ve a project or if you’re already using OpenXR and Meta ISDK.
Create a new Unity Project > Universal 3D Core Template > [Project Name]
Go to Unity > Project Settings > Install the “XR Plugin-in Management”
Under Standalone and Android platform
Enable the OpenXR plugin under Plugin-Providers
Under XR Plugin-in Management > OpenXR > Enabled Interaction Profiles > Click (+) to Add the “Oculus Touch Controller Profile”
Add Meta Quest Support under Android
Go to Package Manager > My Assets > Search for “Meta XR Interaction SDK” (If you can’t find this asset, it means you need to add it to your profile from the Unity Asset store)
Go to Meta > Tools > Building Blocks
Search for the “Passthrough” Building Block and add it to your scene
Search for the “Virtual Hands” Building Block and add it to your scene
Review Project Setup Tool & Apply Fixes (Meta > Tools > Project Setup Tool)
Review all the OpenXR settings shown on the images below and make sure they match your own settings
Up to this point, we haven't really used Microgestures, but we have a Mixed Reality OpenXR project ready to go. This project will feature passthrough and hand tracking with virtual hands, but what about Microgestures? Well, that's a great question! Next, we're going to look at two key Microgesture components: OVRMicrogestureEventSource and MicroGestureUnityEventWrapper
OVRMicrogestureEventSource: This is the core component that will help you listen to all Microgesture events. It emits events in which the callback returns a MicrogestureType, such as SwipeLeft, SwipeRight, etc.
OVRMicrogestureEventSource: wraps a OVRMicrogestureEventSource using UnityEvents so they can be wired in the inspector.
Let me show you a basic C# script example to demonstrate how to use the OVRMicrogestureEventSource component. Additionally, I provide a step-by-step walkthrough in this video.
using UnityEngine;

[RequireComponent(typeof(OVRMicrogestureEventSource))]
public class MicrogestureListener : MonoBehaviour
{
    private OVRMicrogestureEventSource ovrMicrogestureEventSource;

    void Start()
    {
        ovrMicrogestureEventSource = GetComponent<OVRMicrogestureEventSource>();
        ovrMicrogestureEventSource.GestureRecognizedEvent.AddListener(g =>
        {
            LogMicrogestureEvent($"{g}");
        });
    }

    private void LogMicrogestureEvent(string microgestureName)
    {
        Debug.Log($"Microgesture event received: {microgestureName}");
    }
}
Copy and paste the C# code above into a new script, for instance, you could call it MicrogestureListener.cs. Then, add it as a component to any game object; you will see that an OVRMicrogestureEventSource component is automatically added due to the [RequireComponent] attribute. This also requires you to specify a hand; select either the left or right hand. Additionally, pay particular attention to GestureRecognizedEvent, as this is the event that we're listening to, and by doing so, we can detect when Microgestures are emitted.
Run your project via Meta Link or deploy it; keep in mind that if you deploy it, you will need to do a development build and run Logcat in Unity to see the log entries. Another option would be to simply display the message on a Canvas with a Text Mesh Pro label. In my case, I ended up using a custom logger.
Feel free to look at my full project on GitHub which includes this basic integration and other demos.
What if you don’t want to write any code to listen to Microgestures?
In this case, you could add an OVRMicrogestureEventSource and the MicroGestureUnityEventWrapper manually to a game object, just make sure to associate the MicroGestureUnityEventWrapper > OVRMicrogestureEventSource field with the OVRMicrogestureEventSource. Then the wrapper will expose all the Microgesture Types through the inspector.
What are some use cases to use with Hand Tracking microgestures?
Over the last few weeks I asked myself that question and after owning an Apple Vision Pro which purely utilizes hand gestures it was clear to me that we could benefit from effortless hand gestures specifically when dealing with UI/UX, so let me show you a few examples I built:
Microgestures UI Gallery: For this, I created a simple gallery that allowed me to visualize images in a horizontal layout. The images are loaded on Start() and only three are displayed at once; the left and right images are slightly blurred to ensure the center image remains in focus. See Fig 1.1
To control navigating through images & UI position, I mapped the MicrogestureType to the following gestures:
SwipeLeft and SwipeRight to navigate between images.
ThumbTap to select the current image, which scales it up by about 2x to simulate the selection.
SwipeForward and SwipeBackward to push the entire Image Gallery UI back and forth.
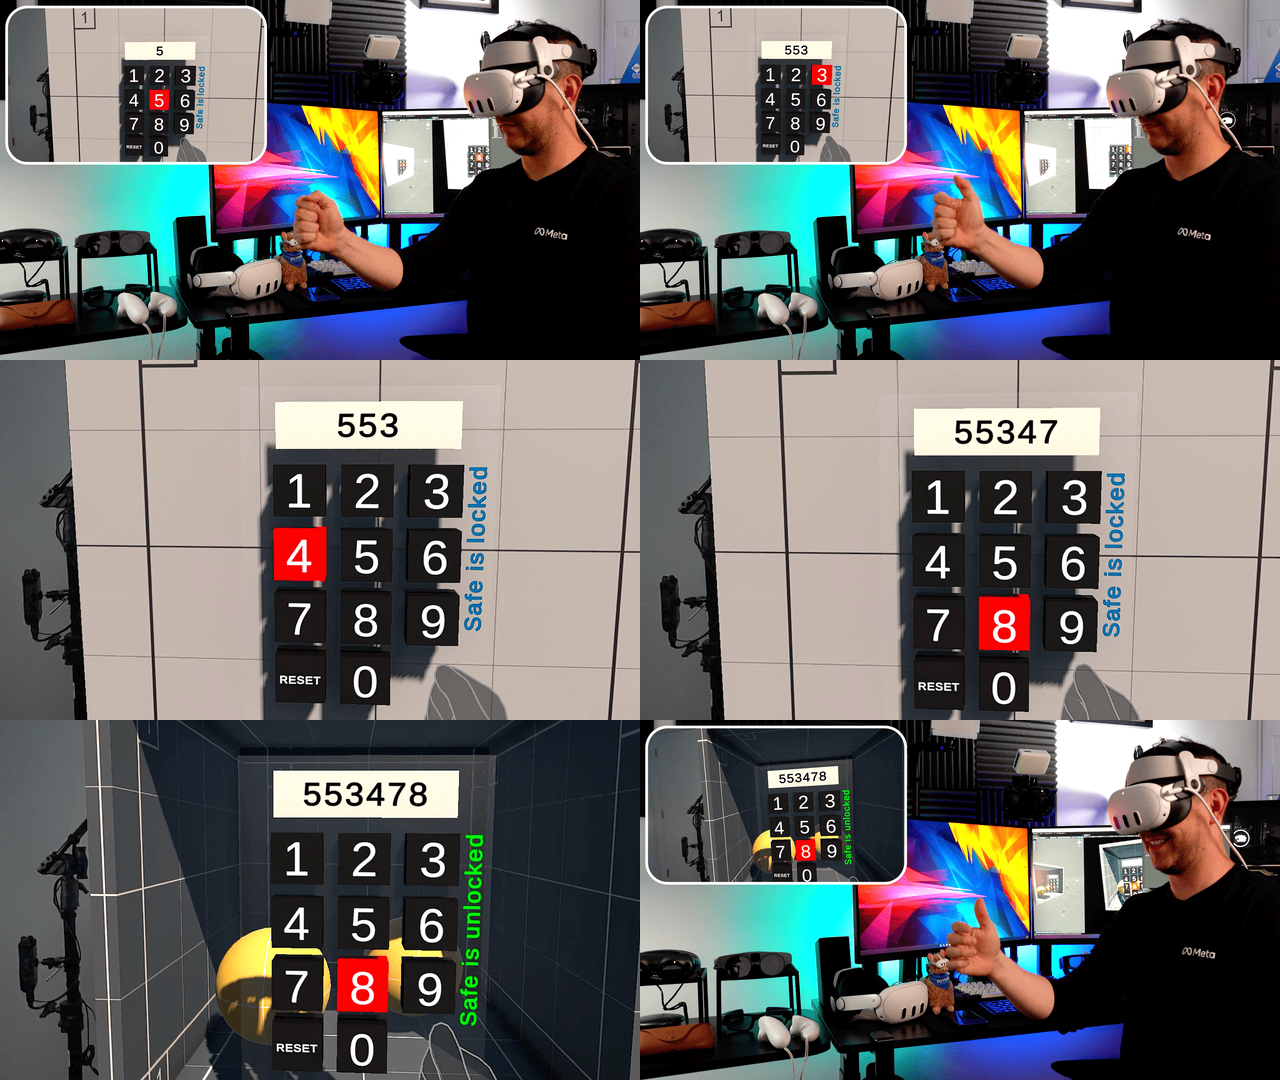
Microgestures with a Keypad: I previously created a keypad that was fully controlled with eye tracking, specifically when I was testing the features on a Quest Pro. However, I ended up refactoring the code and replacing the eye-tracking implementation with Microgestures, and the process was simpler than I thought! See Fig 1.2
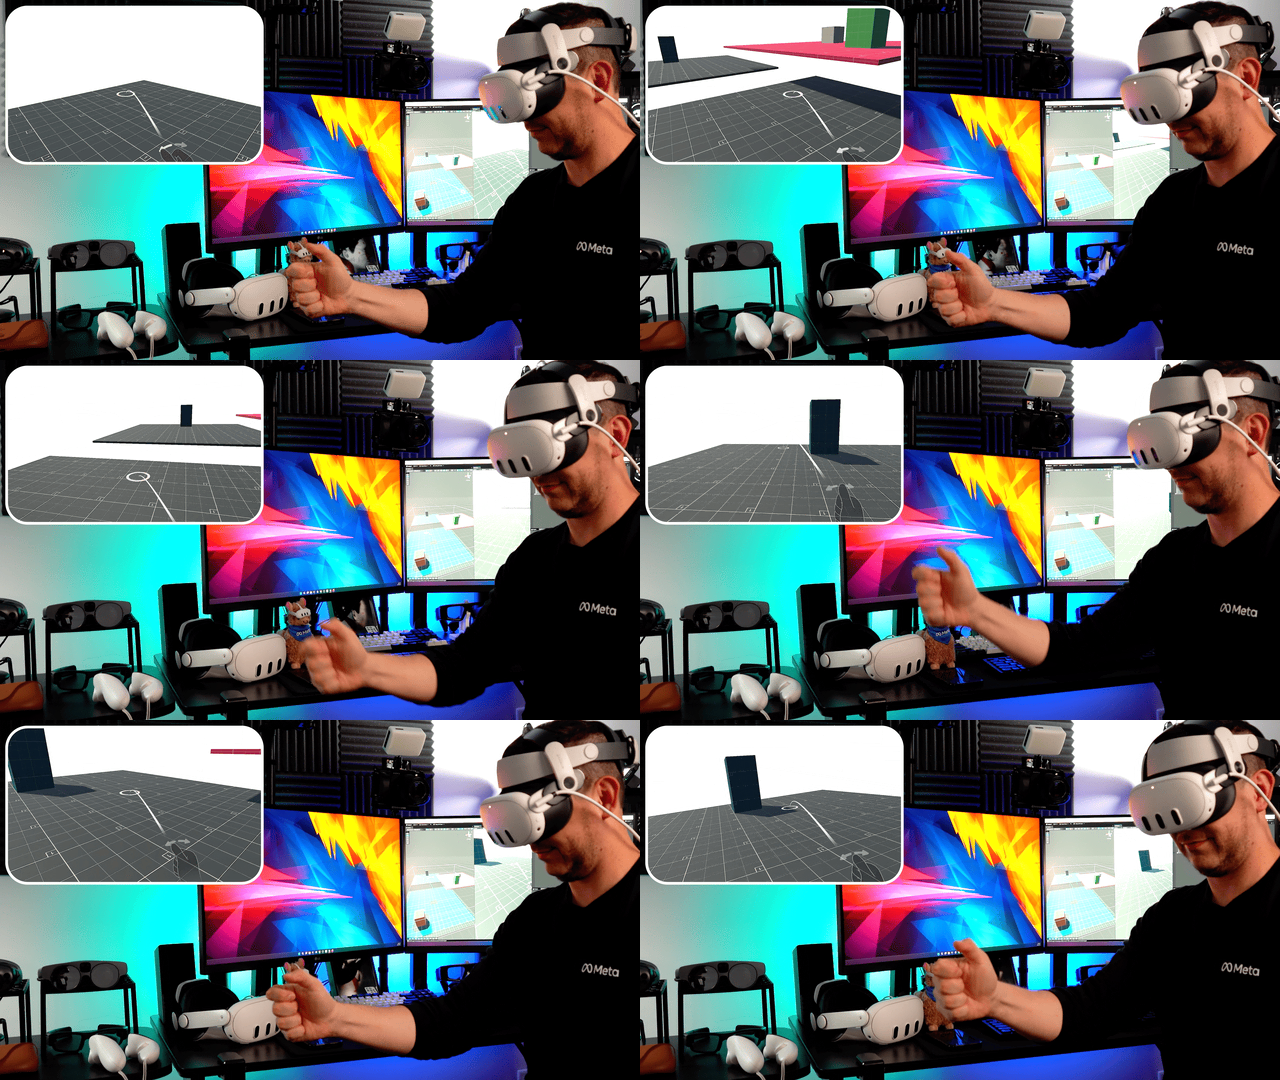
Microgestures with Locomotion: This option is available right from the Teleport Building Block. Simply drag and drop it into your scene, and you will have a locomotion rig available that is fully controlled with Microgestures. To activate microgestures, first perform a ThumbTap, then left and right arrows are displayed to hint at the SwipeLeft and SwipeRight microgesture features. See Fig 1.3
Here is also an example of how some of the code for the Microgestures UI Gallery works. I first load the images, check to make sure I have enough images, and then bind to our GestureRecognizedEvent. After this, we update the gallery images based on the microgesture type direction.
void Start()
{
    imageList = Resources.LoadAll<Sprite>("GalleryImages").ToList();

    if (imageList.Count < 3)
    {
        Debug.LogError("You need at least 3 images in the list.");
        return;
    }

    ovrMicrogestureEventSource = GetComponent<OVRMicrogestureEventSource>();
    ovrMicrogestureEventSource.GestureRecognizedEvent.AddListener(OnMicrogestureRecognized);
}

void OnMicrogestureRecognized(OVRHand.MicrogestureType microgestureType)
{
    if (microgestureType == OVRHand.MicrogestureType.SwipeLeft)
    {
        currentIndex = (currentIndex - 1 + imageList.Count) % imageList.Count;
        UpdateGallery();
    }
    if (microgestureType == OVRHand.MicrogestureType.SwipeRight)
    {
        currentIndex = (currentIndex + 1) % imageList.Count;
        UpdateGallery();
    }
}
What do you think about Hand Tracking microgestures after building these demos?
The detection of Microgestures was super accurate, to be honest. The safe keypad demo that I just showed you worked great, but I would say that in some scenarios I kept typing the wrong numbers during swipe left or right because the system thought I was doing a thumb tap instead of a swipe. Also, I don’t know if it’s just me, but Microgestures could be a bit tiring on my fingers. There were some instances where I had to extend my thumb quite a bit to the left or right for the system to detect a Swipe Left or Right. In those situations, my thumb started to hurt a bit, not too bad, but I can’t imagine doing this over and over for hours and finding it any better.
In conclusion, this is incredible technology. Yes, there is room for improvement, but the way it works feels magical.
I hope you liked this post! Feel free to drop any questions in the comments below, or if you’d like a visual explanation, watch my full YouTube video here.
Thank you so much, everyone, and happy XR coding!
Resources
YouTube Video: Hand Tracking with Microgestures is Here! (Full Setup and Showcases)
GitHub repo with a variety of Microgesture demos
Unity Hand tracking microgestures OpenXR extension: docs
Microgestures Locomotion: docs


