Quest 3 Mixed Reality With Meta Depth API - New Occlusion Features!
Augmented Reality frameworks such as ARKit and ARCore didn't initially include occlusion features, and neither did Meta when they first introduced Passthrough a few years ago with the Quest 1. Today, I would like to introduce you to "Meta Depth API," which is part of Meta's Presence Platform tools and can significantly enhance mixed reality experiences by allowing digital objects to be occluded by the real world.
So, what can you really do with occlusion, and why is it so important for mixed reality? Let me show you a few examples in which we will look at Hard Occlusion vs Soft Occlusion, and also understand why this can add a big level of realism to your Quest 3 mixed reality experiences.
Meta Depth API Soft Occlusion Vs Hard Occlusion
The main differences between soft and hard occlusion remind me of shadows in Unity. If you've used Unity as much as I have, you probably know that certain shadow settings can produce better results but require more compute power. Similarly, soft occlusion looks a lot better, but smoothing the edges of a physical object during occlusion can impact GPU performance. Here are the definitions that Meta provides for both:
Hard occlusion is cheaper to compute, but has a jagged edge and more visible temporal instability.
Soft occlusion is visually more appealing, but requires more GPU.
During my testing in Unity with the Meta Depth API, I didn't observe a significant impact on performance. However, I recommend enabling "GPU" and "CPU" metrics (using the Meta Developer Hub) along with other statistics and profiling your Unity Mixed Reality application before enabling these features.
Meta Depth API - Transitioning from Soft Occlusion to No Occlusion and then to Hard Occlusion.
Meta Depth API - Transitioning from Soft Occlusion to Hard Occlusion.
Meta Depth API - Using URP Vs Standard Shaders
Meta offers two options for Unity developers: one is to use the Meta Depth API with the standard rendering pipeline, and the other option is to use URP (Universal Rendering Pipeline). With the standard pipeline, you get access to 2 shaders, while URP seems to offer a greater level of detail for controlling occlusion by providing additional shader options. Here are the shaders available today for both:
Meta Depth API - Standard Rendering Pipeline Occlusion Shaders.
Meta Depth API - Universal Rendering Pipeline Occlusion Shaders.
Meta Depth API Requirements
Below are all the requirements for Meta Depth API in your Unity project. I also highly recommend watching my step-by-step video, where I guide you through the entire process.
VERY Important - you must have a scene model setup before running a Unity project with occlusion. If you don’t, occlusion features will just not work, and your model may just become invisible when soft or hard occlusion types are enabled.
Unity 2022.3.1 and higher or 2023.2 and higher
One of the following:
Oculus Integration SDK 57 or greater
Selective Package method:
com.meta.xr.sdk.utilities (57.0.0-preview or higher)
com.meta.xr.sdk.sharedassets (56.0.0-preview or higher)
To clarify the previous 2 steps - you could download the Oculus integration and won't need the selective package approach, or vice versa. Meta is simply providing you with options to keep your codebase as clean as possible. The Oculus integration package is packed with features that you may or may not need, so double-check it before downloading the entire package.
Package com.unity.xr.oculus version 4.2.0-exp-env-depth.1 or greater (this will installed automatically with the next step, so just double check that it uses this version after installing the Meta Depth API)
Meta Depth API Package(s):
https://github.com/oculus-samples/Unity-DepthAPI.git?path=/Packages/com.meta.xr.depthapi (use this when you are targeting the standard rendering pipeline in your project)
https://github.com/oculus-samples/Unity-DepthAPI.git?path=/Packages/com.meta.xr.depthapi.urp (use this plus the previous package if you’re targeting the universal rendering pipeline)
A Quest 3 headset is required to test these features
Enable experimental features on your Quest 3 by using the Android SDK installed through your Unity installation or if you installed separately it may be already in your environment path.
adb shell setprop debug.oculus.experimentalEnabled 1
If you'd like to try out a demo project to test this, I recommend cloning or downloading the Meta Depth API Examples from here. I've also created a few demos on a private repository based on the YouTube video released as part of this post. If you'd like access, please consider becoming a Patron, and I will grant you access (THANK YOU).
Meta Depth API - Unity Step By Step Project Setup
To create a brand new Unity project with a Quest 3, follow these steps. This project will utilize passthrough, scene understanding, and occlusion.
Create a new Unity Project with Unity versions described previously under requirements
Switch your Unity project to Android
Download the Oculus Integration (affiliate link) by going to Window > Package Manager > My Assets
In the Package Manager click on the + symbol to “add package from git url then paste the following:
https://github.com/oculus-samples/Unity-DepthAPI.git?path=/Packages/com.meta.xr.depthapi
(Only if you need to support URP paste this after the previous step installs) https://github.com/oculus-samples/Unity-DepthAPI.git?path=/Packages/com.meta.xr.depthapi.urp
Create a new Unity scene and delete the default “Main Camera”
Search for “OVRCameraRig” in the Project tab search area, then drag and drop it into your scene. Make sure its position is set to (0,0,0)
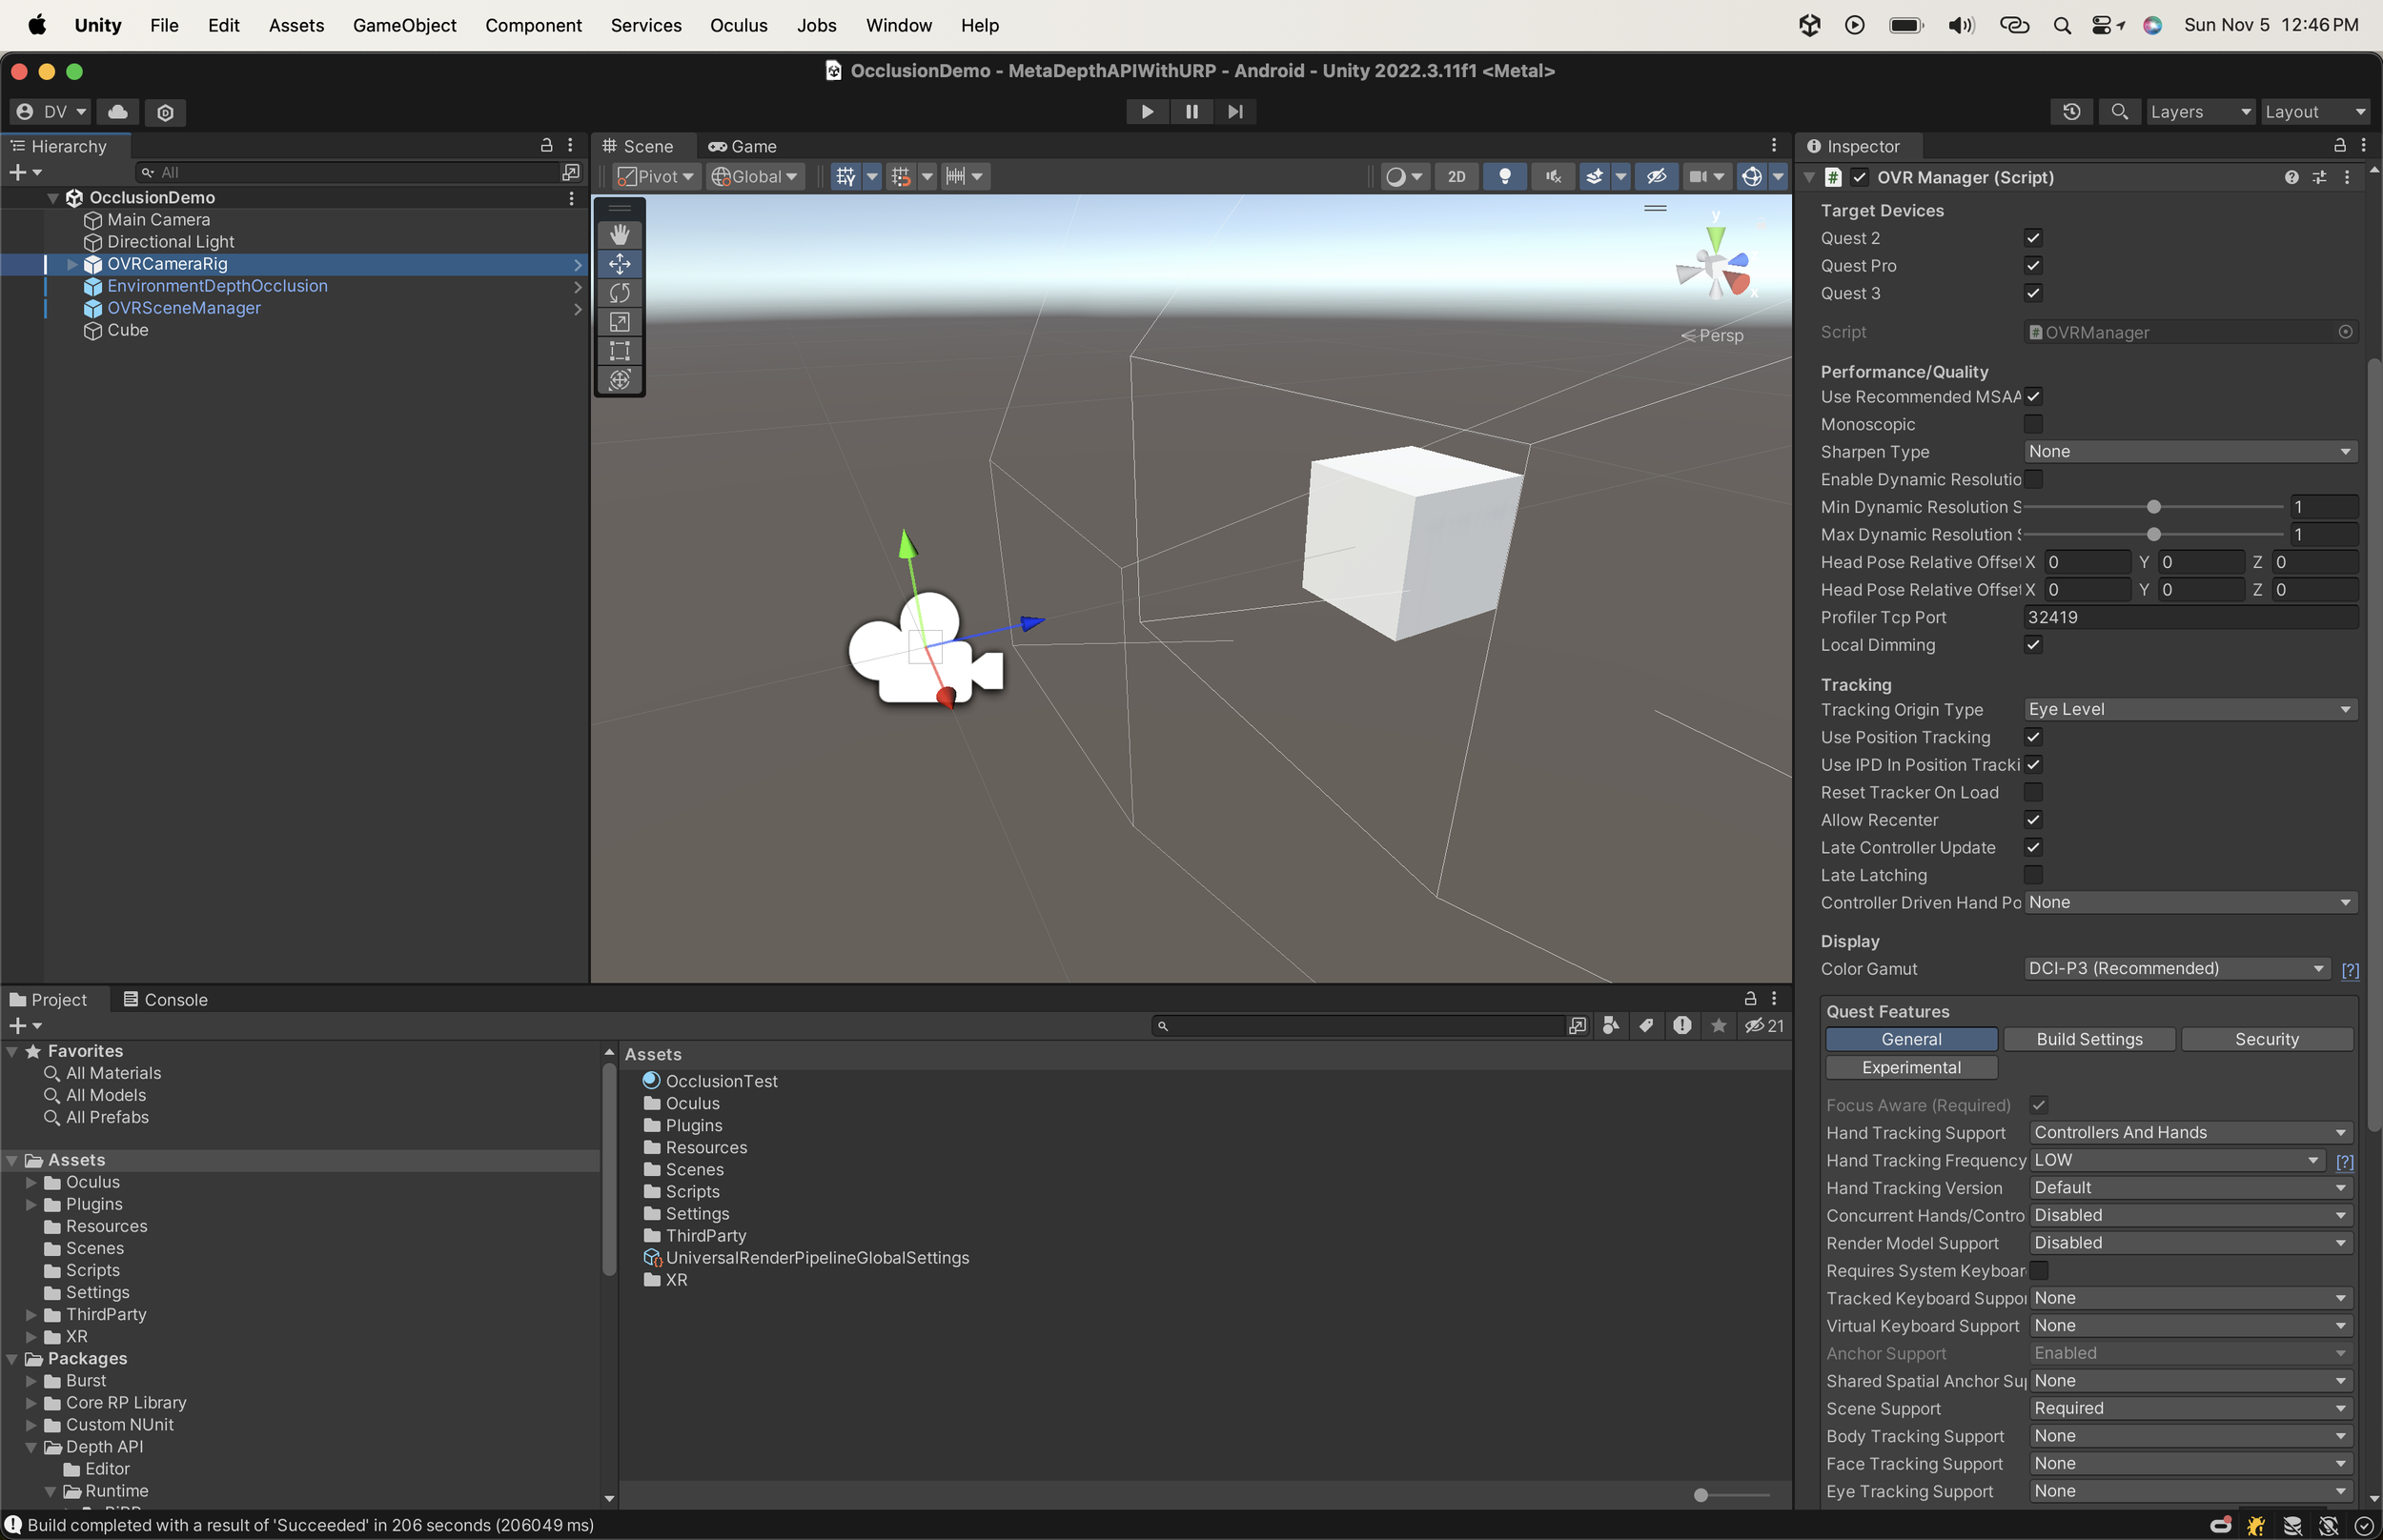
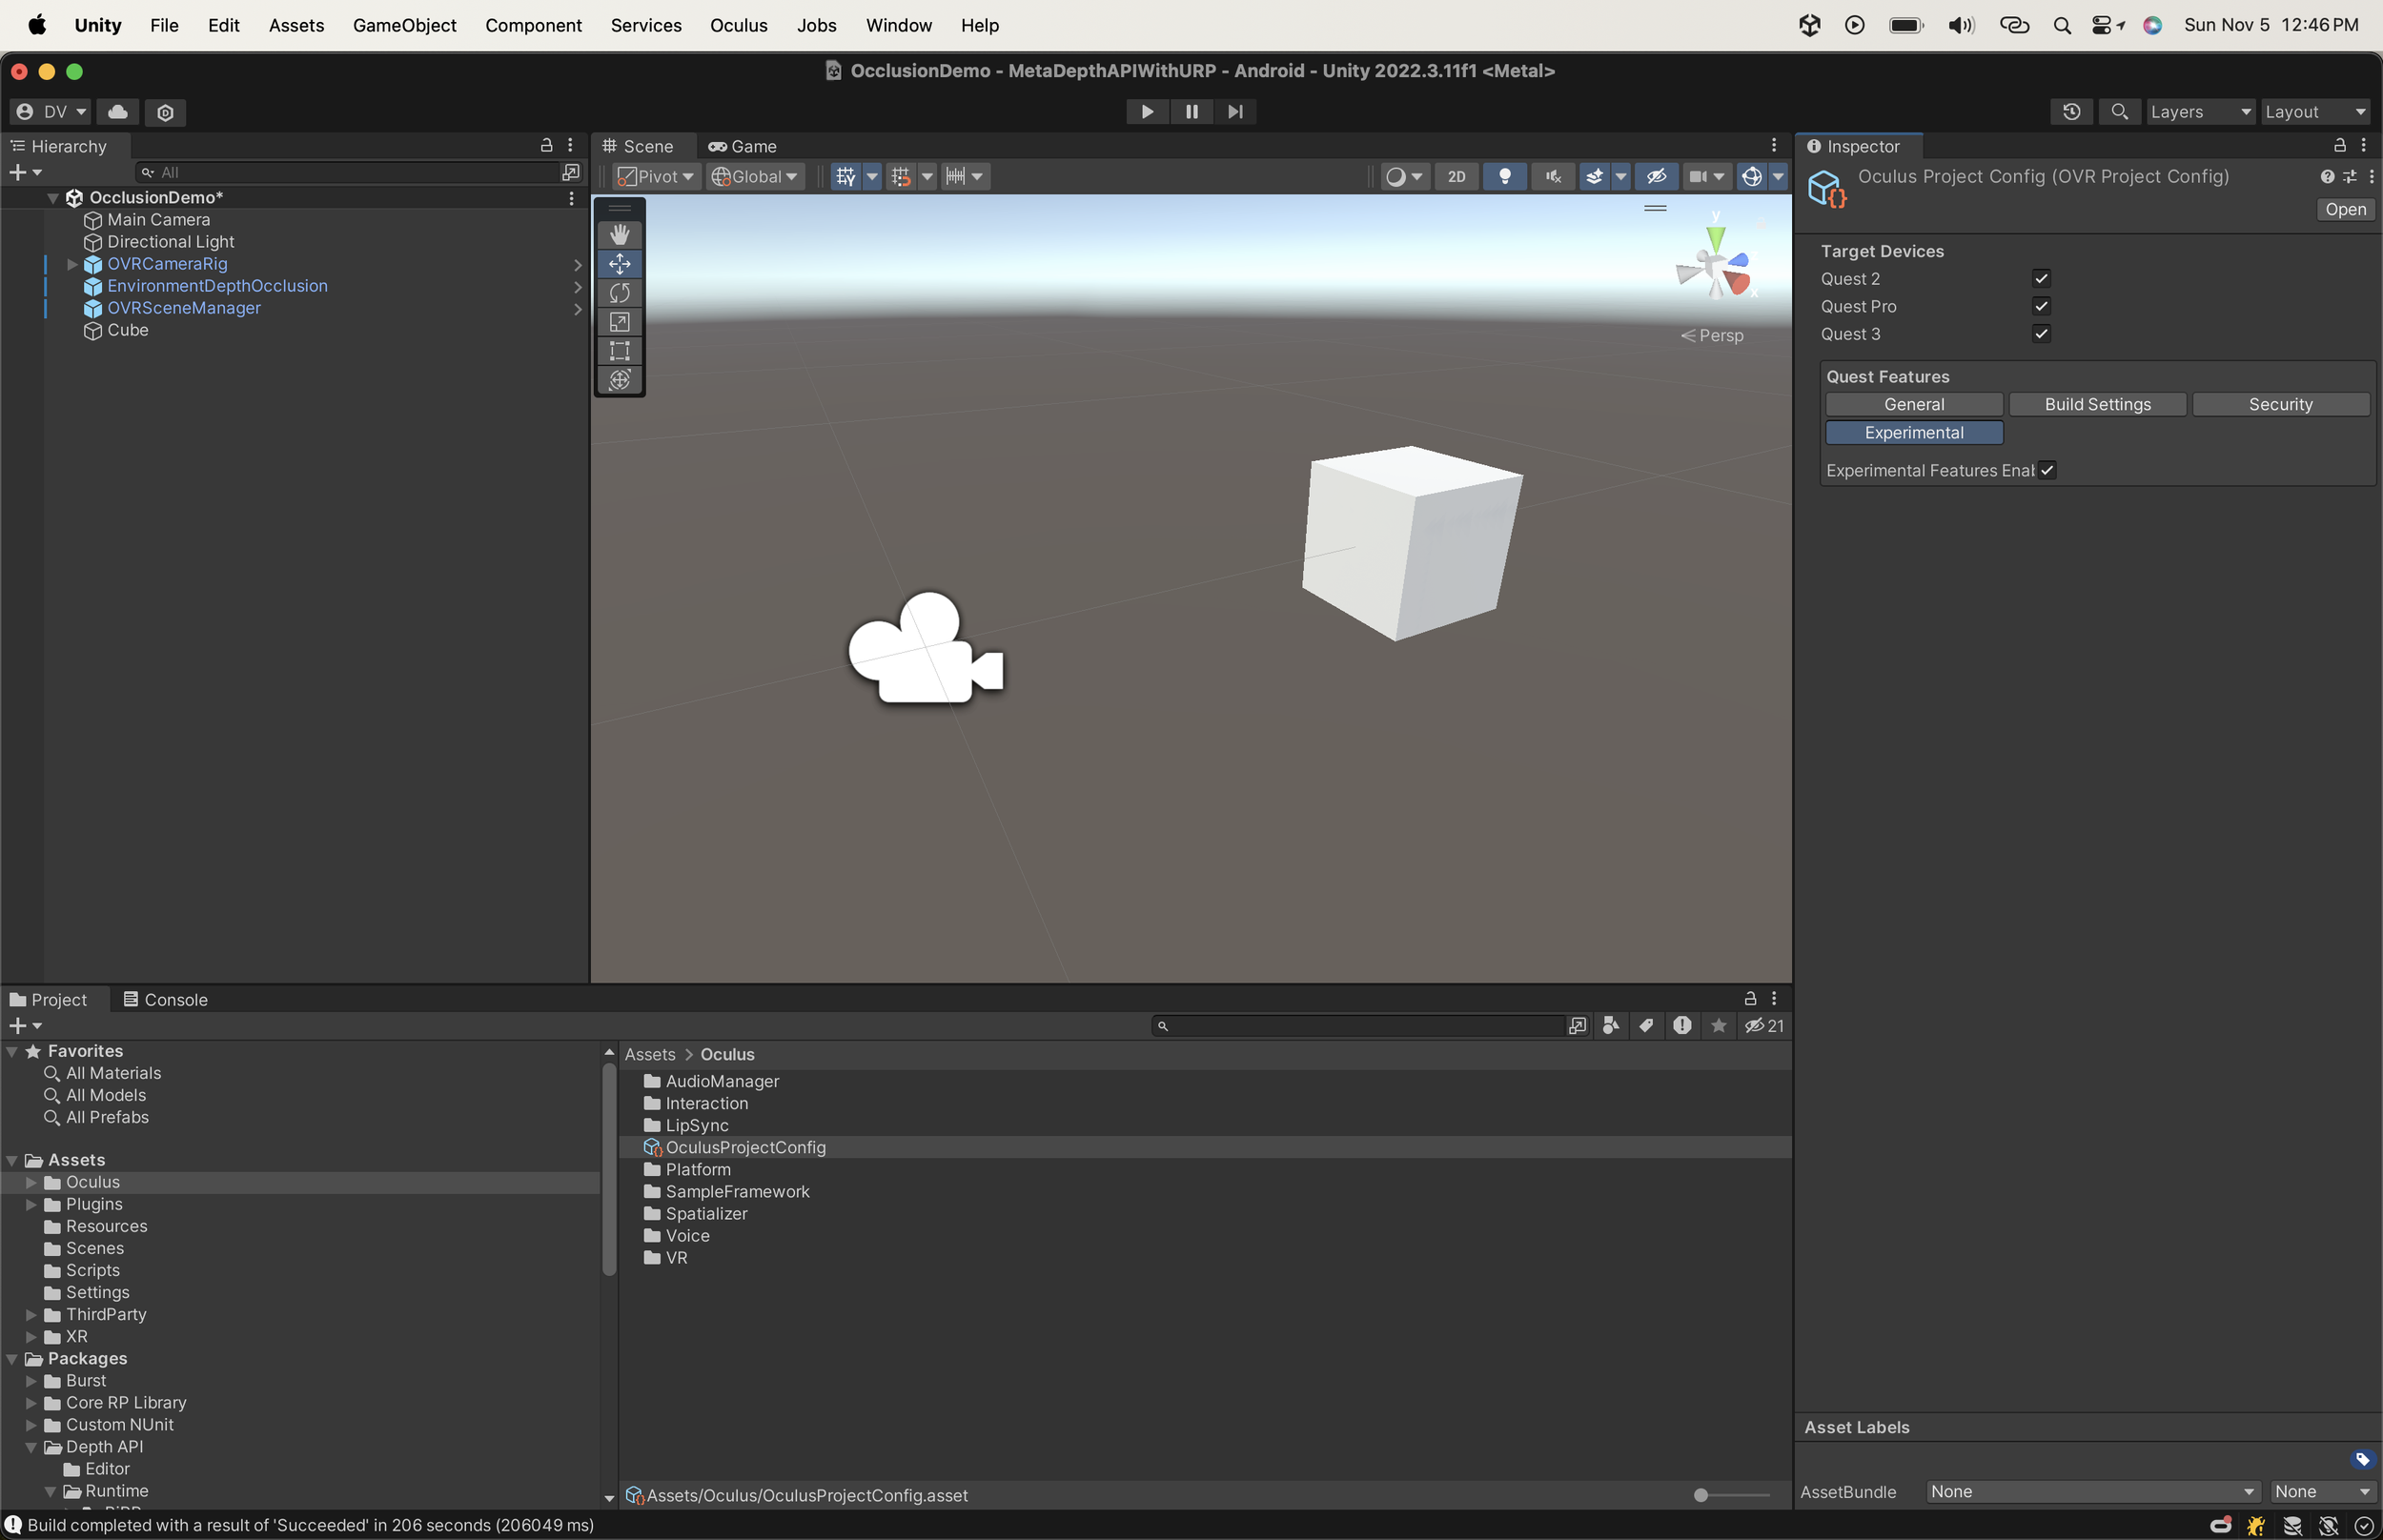
With the “OVRCameraRig” selected, look at the “OVR Manager” and enable the following settings:
Quest3
Quest Features (General):
Controllers & Hands
Scene Support as Required
Passthrough Support as Required
Quest Features (Experimental)
Experimental Features Enabled is Checked
Insight Passthrough
Insight Passthrough is Checked
Add a new component to your “OVRCameraRig” called “OVR Passthrough Layer” and set the compositing option to placement underlay
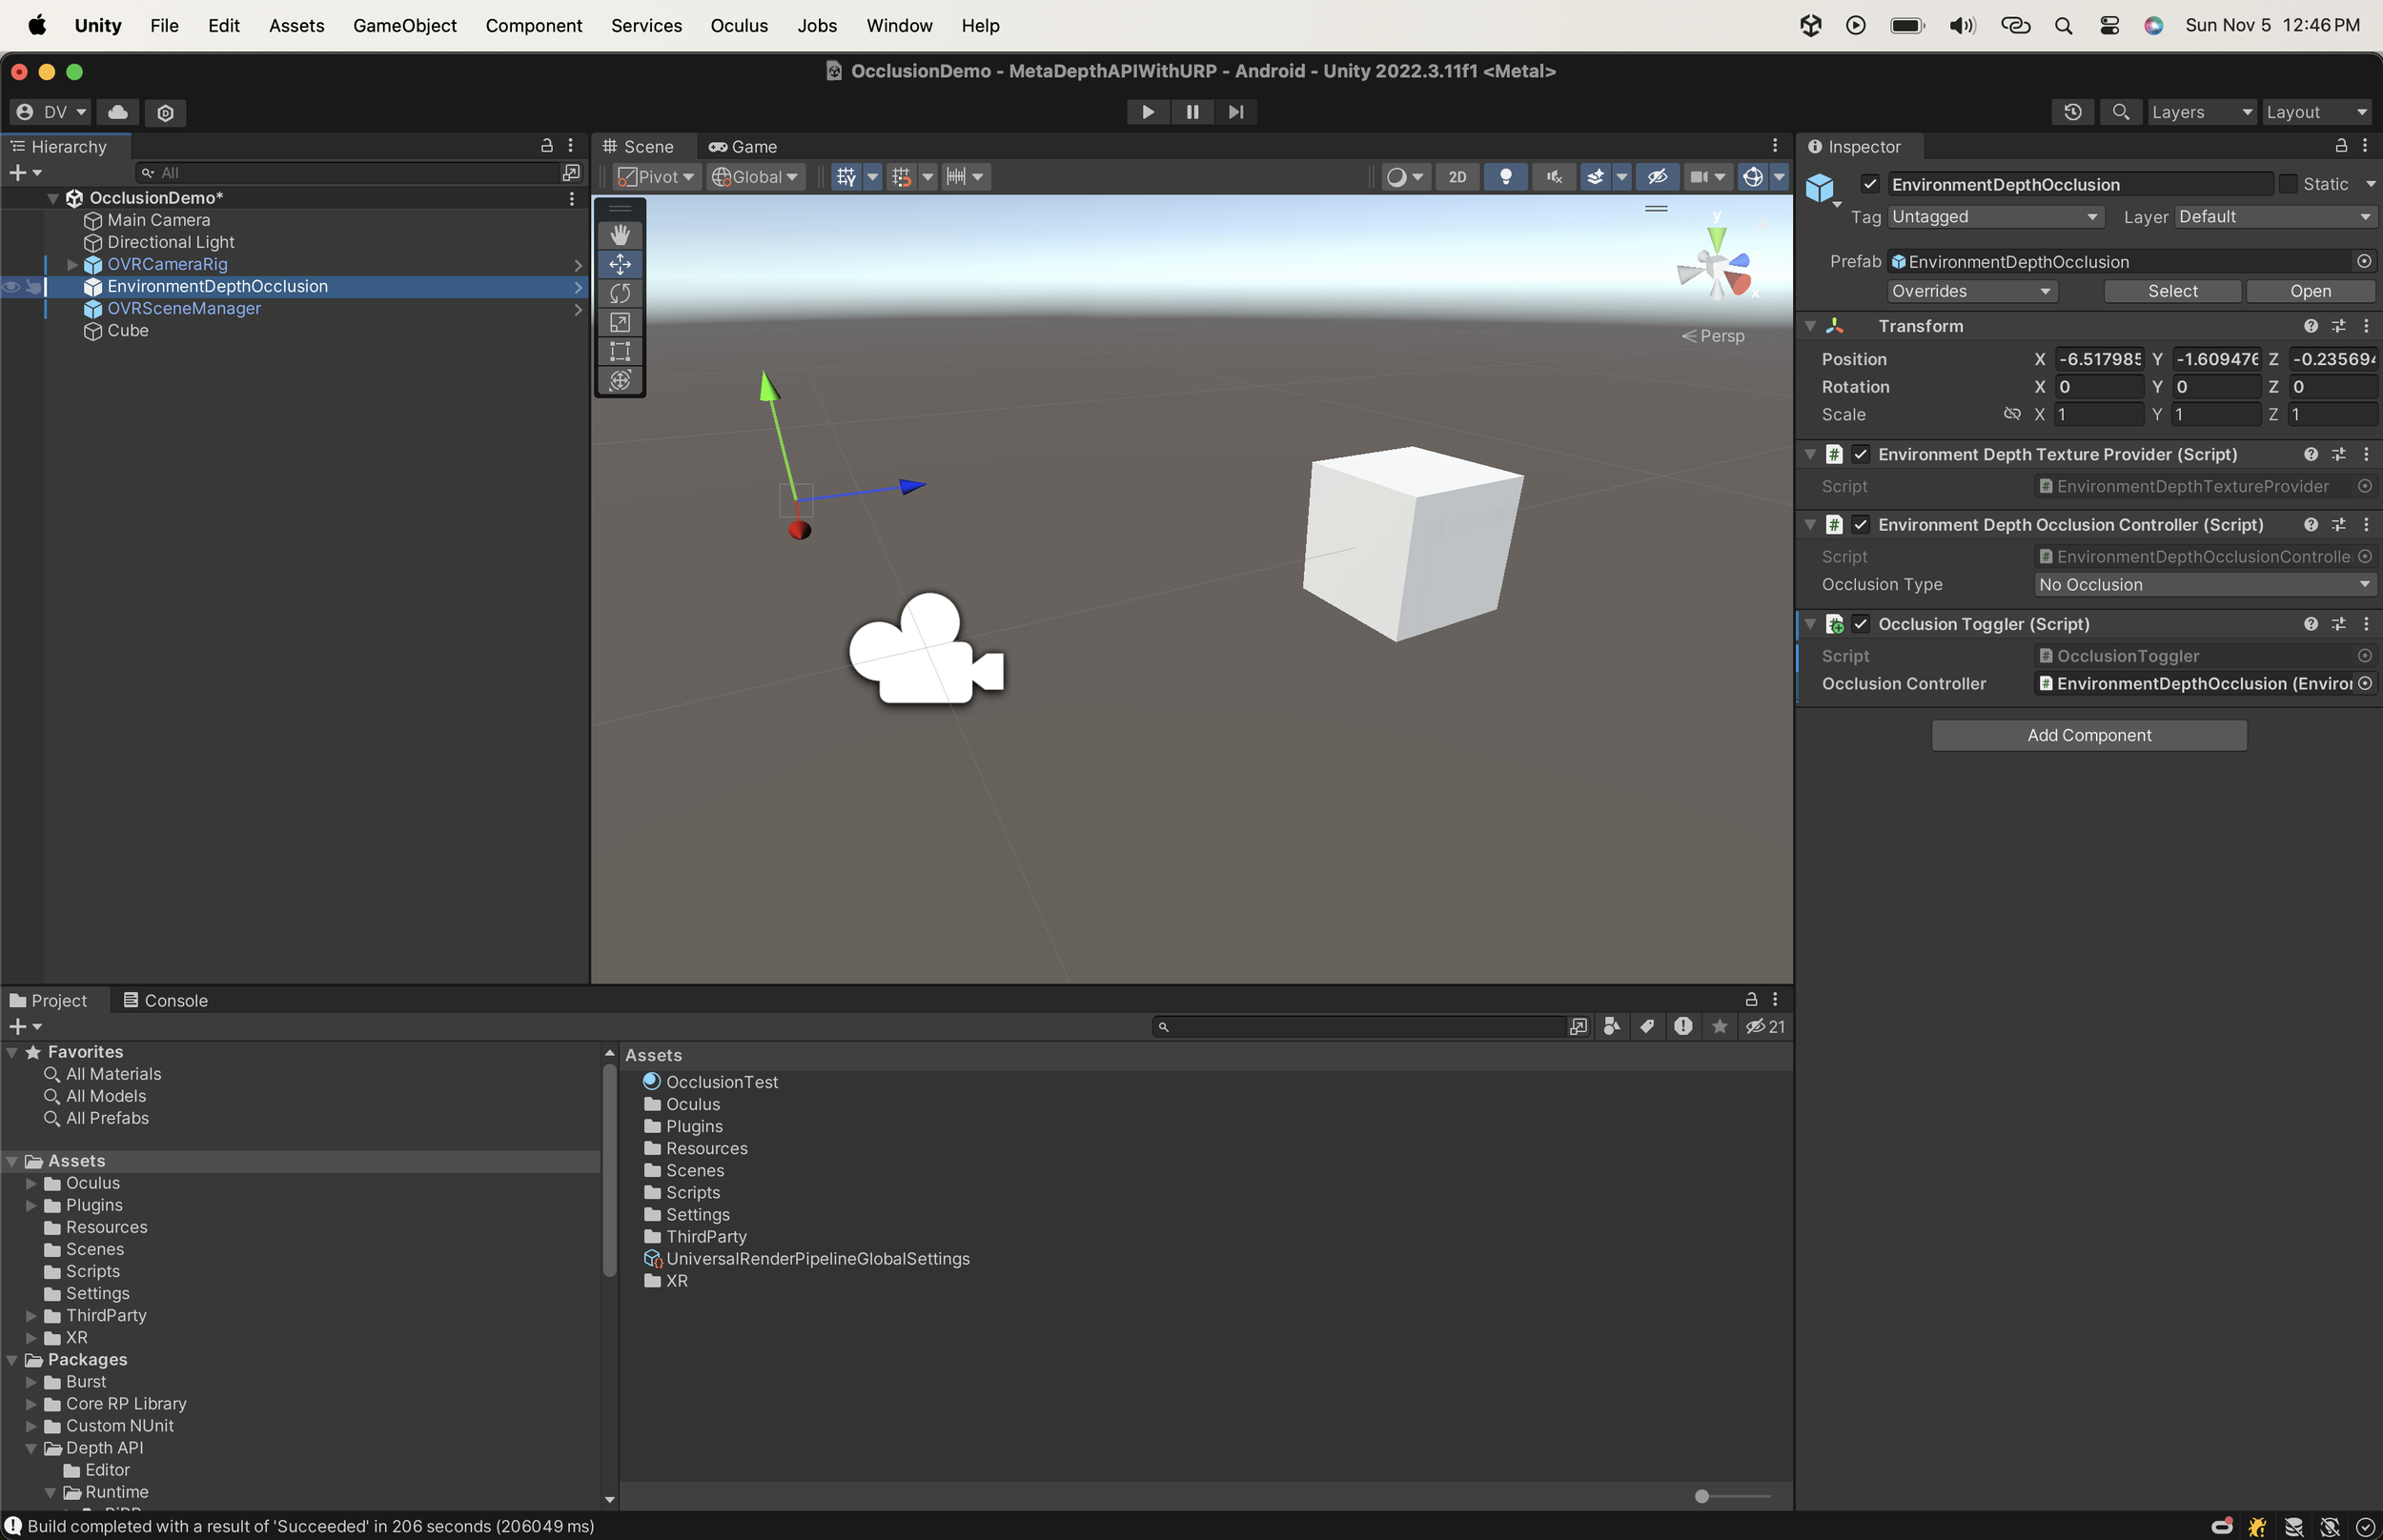
In your project tab, search for “Depth API” > “Runtime” > “Core” > “Prefabs” and drag and drop “EnvironmentDepthOcclusion” prefab into your scene or hierarchy
Add the “OcclusionToggler.cs” script to Unity and then add it to your “OVRCameraRig”. Associate the “Occlusion Controller” inspector value with your “EnvironmentDepthOcclusion” “Environment Depth Occlusion Controller” component.
In your project tab, search for “OVRSceneManager” and drag it and drop it into your scene or hierarchy.
Search for “Invisible” and drag and drop the “InvisiblePlane” to the "Plane Prefab” inspector value in the “OVRSceneManager”, repeat this process by dragging and dropping the “InvisibleVolume” for the “Volume Prefab”
Go to File > Build Settings > Player Settings > Oculus and apply all recommended found issues by clicking on “Fix All”
Create a new material and call it “OcclusionTest” then assign the “Occlusion Standard” shader if you’re using the standard rendering pipeline or “Occlusion Lit” if you are using URP. There’re other shaders available for particles as well.
Create a new 3D object named “Cube” by right clicking on your hierarchy > 3D Object > Cube then scale it to (0.15, 0.15, 0.15) and position it at (0,0,0.5)
Assign “OcclusionTest” material to your new “Cube” game object
Run this command by using the adb application that comes with your Android SDK tools:
adb shell setprop debug.oculus.experimentalEnabled 1
Connect your Quest 3 to your computer by using a USB-C connection, be sure developer mode is enabled, and in the device be sure to allow USB to connect to your Quest 3 device. Once you do so you should be able to see your Quest 3 listed under File > Build Settings > Run Device, select it and select Build And Run.
I’ve also created a GitHub demo which you can use to test these features. The GitHub repo is available here.


Meta Depth API and Meta Scene Understanding
An essential aspect of the Meta Depth API is that it requires a Quest 3. The primary reason for this requirement is that previous Quest generations did not come equipped with a depth sensor. This sensor is what enables your device to capture physical environment data and, consequently, provide depth information. Additionally, this stereo data is all accessible as part of scene understanding, and according to Meta, it is recommended to use both when integrating the Meta Depth API with your Unity project.
Here's what Meta has to say about their use:
“Mesh API and Depth API were designed to leverage existing Presence Platform MR capabilities to support dynamic interactions involving users’ physical environments. Depth API uses annotations through Scene Model to augment the stereo depth data—in order to get that data, we recommend initiating Space Setup. While it’s possible to use Depth API without Scene Understanding, we recommend getting familiar with Scene (Unity | Unreal | OpenXR | WebXR) before building with these new capabilities.” Source
Do I recommend Meta Depth API?
Well, this is hard to say without a lot more testing, but to be honest with my first impressions, I feel that mixed reality experiences look way more realistic when enabling occlusion, which may be obvious. When I was testing the small 3d platformer I built, it was just amazing to see the character getting occluded behind real-world objects. It felt so realistic when I could simply move my hand across digital objects and know that my hand was above everything while occluding objects in the foreground. Additionally, a simple test of putting my hand through an object and seeing how it calculates the appropriate depth in real-time was incredible.
On the other hand, I recommend testing and profiling these new features. I did notice spikes when activating both occlusion modes, but nothing alarming. Also, the occlusion details are still not perfect, but it is a significant improvement compared to what we had before, which was a basic grayscale passthrough without any understanding of the real world on Quest 1. Now, we have better color passthrough with a cool depth sensor on Quest 3. I can't wait to see what's to come with the Meta Depth API, just like they did with hand tracking interactions where each version brought so many great improvements.